
I had the pleasure of attending the recent Italian UserCon with a session on Tanzu Kubernetes Grid and the creation of a standalone management cluster. Out of this experience comes this series of posts on the topic.
As mentioned above this series of articles is on TKG Standalone version 2.4.0, it should be pointed out that the most common solution to use is TKG Supervisor (refer to the official documentation)
But then when does it make sense to use TKG Standalone?
- When using AWS or Azure
- When using vSphere 6.7 (vsphere with Tanzu has only been introduced since version 7)
- When using vSphere 7 and 8 but need the following features : Windows Containers, IPv6 dual stack, and the creation of cluster workloads on remote sites managed by a centralized vcenter server
Let’s look at the requirements for creating TKG Standalone:
- a bootstrap machine
- vSphere 8, vSphere 7, VMware Cloud on AWS, or Azure VMware Solution
I have reported only the main requirements, for all details please refer to the official link
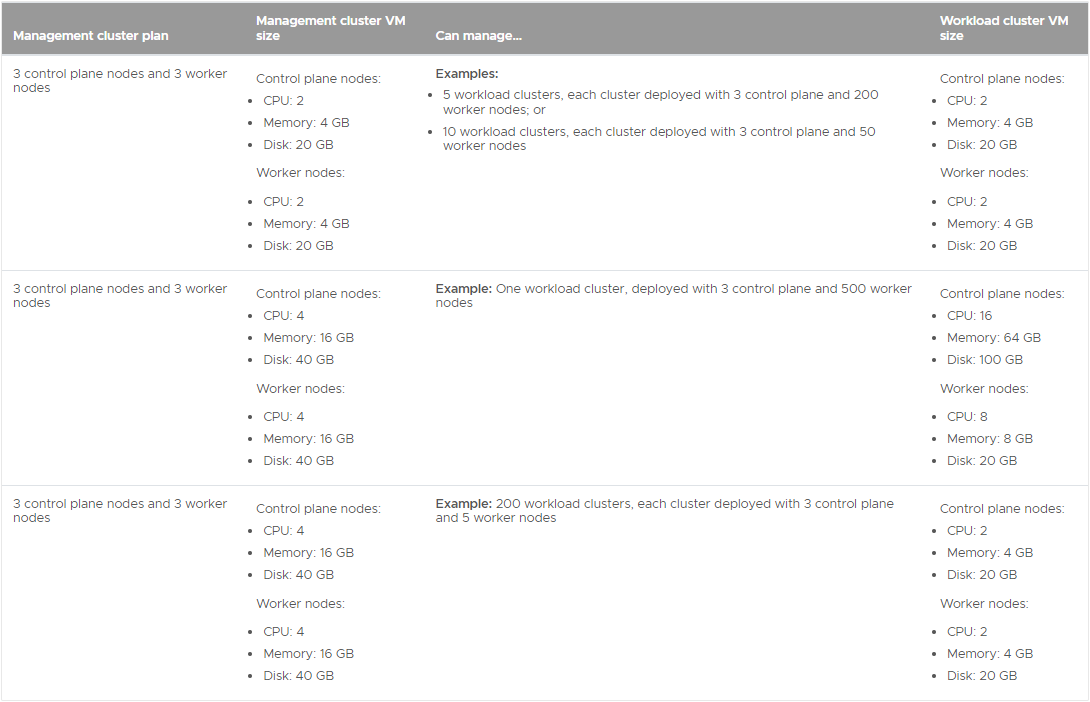
Management Cluster Sizing
Below is a table showing what resources to allocate for management cluster nodes based on the number of workload clusters to be managed.
In order to create the management cluster, it is necessary to import the images to be used for the nodes; the images are available from the vmware site downlaods.
I recommend using the latest available versions:
- Ubuntu v20.04 Kubernetes v1.27.5 OVA
- Photon v3 Kubernetes v1.27.5 OVA
Once the image has been imported, it is necessary to convert it to a template.
Creating bootstrap machine
Maybe that is the funniest part 🙂 I chose a Linux operating system, specifically Ubuntu server 20.04.
Recommended requirements for the bootstrap machine are as follows : 16GB RAM, 4 cpu and at least 50GB disk space.
Here are the details of mine

Update to the latest available package
sudo apt update
sudo apt upgrade
Important! synchronize time via NTP.
If you are using the bootstrap machine in an isolated environment, it is useful to also install the graphical environment so that you can use a browser and other graphical tools.
apt install tasksel
tasksel install ubuntu-desktop
reboot
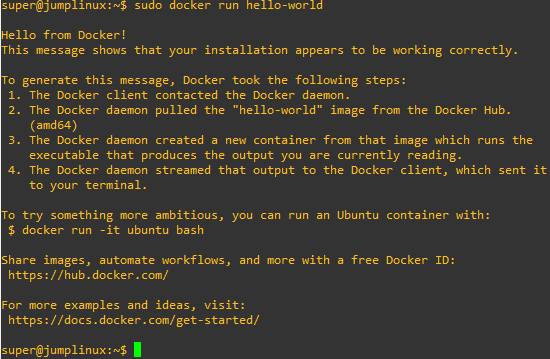
Manage Docker as a non-root user
sudo groupadd docker
sudo usermod -aG docker $USER
docker run hello-world
Configure Docker to start automatically with systemd
sudo systemctl enable docker.service
sudo systemctl enable containerd.service
Activate kind
sudo modprobe nf_conntrack
Install Tanzu CLI 2.4
Check the Product Interoperability Matrix to find which version is compatible with TKG 2.4
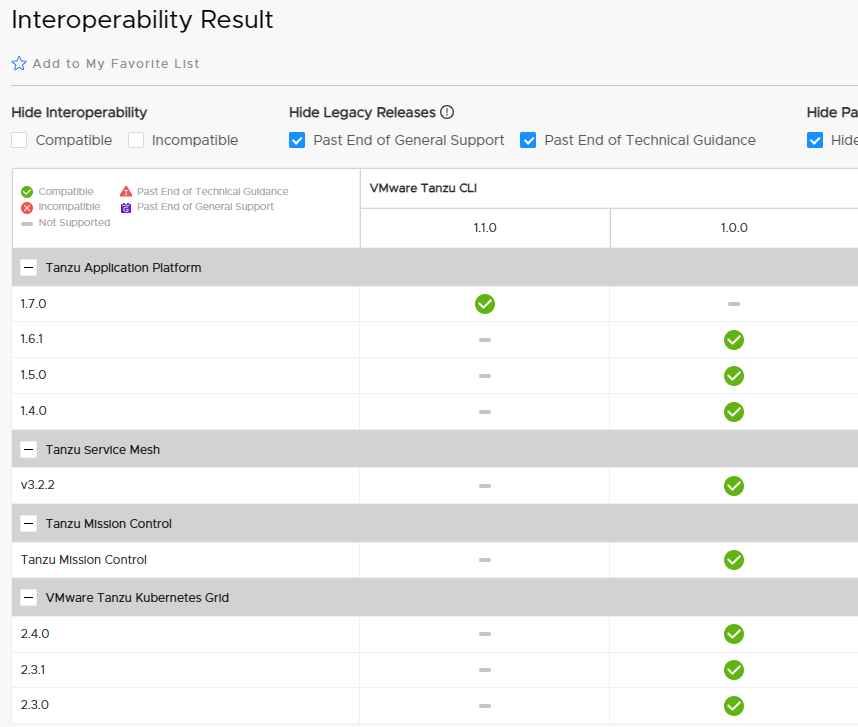
Once you have identified the compatible version, you can download it from vmware
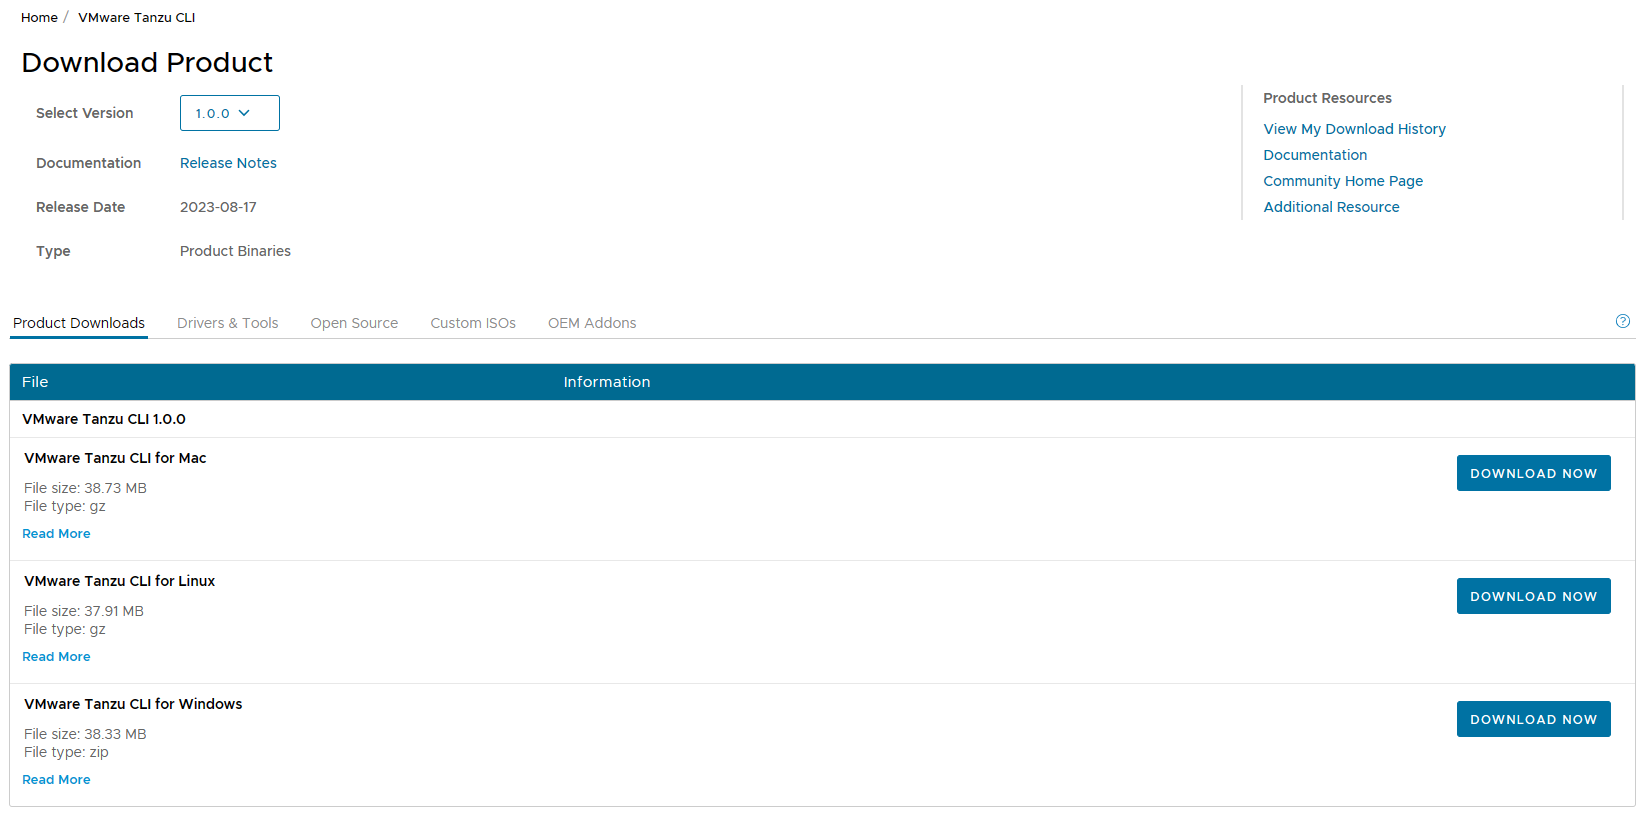
Proceed to install the CLI in the bootstrap machine (as a non-root user)
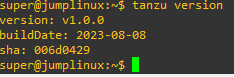
mkdir tkg
cd tkg
wget https://download3.vmware.com/software/TCLI-100/tanzu-cli-linux-amd64.tar.gz
tar -xvf tanzu-cli-linux-amd64.tar.gz
cd v1.0.0
sudo install tanzu-cli-linux_amd64 /usr/local/bin/tanzu
tanzu version
Installing TKG plugins
tanzu plugin group search -n vmware-tkg/default --show-details
tanzu plugin install --group vmware-tkg/default:v2.4.0
tanzu plugin list

Download and install on the bootstrap machine the kubernetes CLI for Linux
cd tkg
gunzip kubectl-linux-v1.27.5+vmware.1.gz
chmod ugo+x kubectl-linux-v1.27.5+vmware.1
sudo install kubectl-linux-v1.27.5+vmware.1 /usr/local/bin/kubectl
kubectl version --short --client=true

Enable autocomplete for kubectl and Tanzu CLI.
echo 'source <(kubectl completion bash)' >> ~/.bash_profile

echo 'source <(tanzu completion bash)' >> ~/.bash_profile
As the last thing we generate the SSH keys to be used in the management cluster creation wizard
ssh-keygen
cat ~/.ssh/id_rsa.pub
This last operation completes the first part of the article.
The second part is available here


