
Last article in the series is about preparing esxi hosts to turn them into Trasnport Nodes.
First you need to create some profiles to be used later for preparing hosts.
From the Manager console, move to System -> Fabric -> Profiles -> Uplink Profiles.
Select + ADD PROFILE

Enter the name of the uplink profile, if not using LAG (LACP) move to the next section.
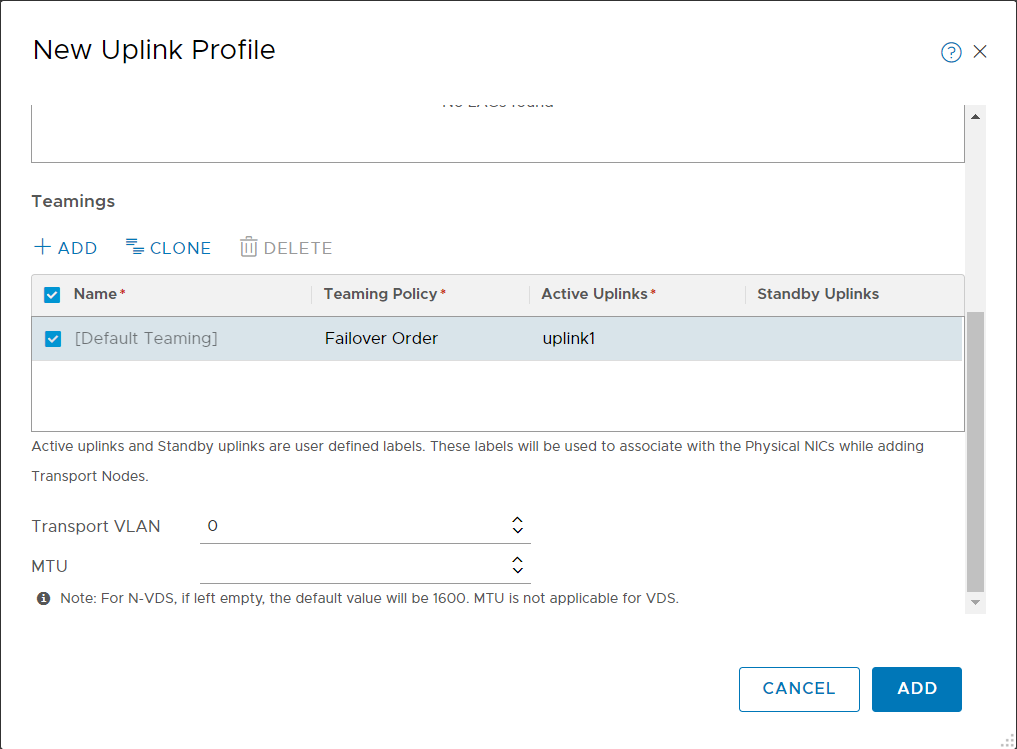
Select the Teaming Policy (default Failover Order) and enter the name of the active uplink. Enter the VLAN ID, if any, to be used for the overlay network and the MTU value.
Move to Transport Node Profiles.
Select + ADD PROFILE
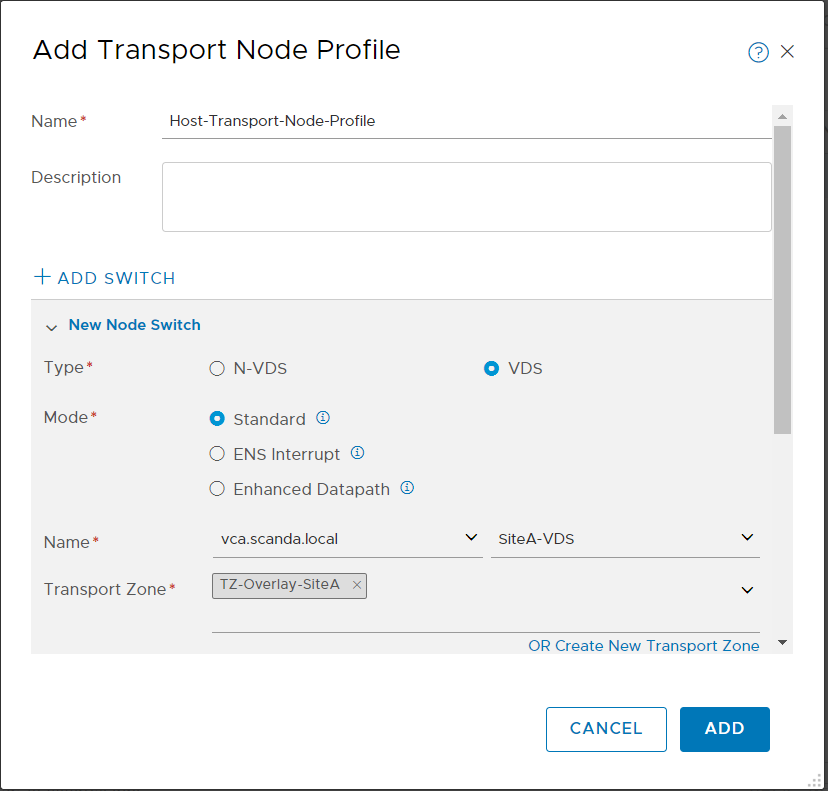
Enter the name of the profile, select the type of Distributed switch (leave the Standard mode), select the Compute Manager and the related Distributed switch.
In the Transport Zone section indicate the transport zones to be configured on the hosts.
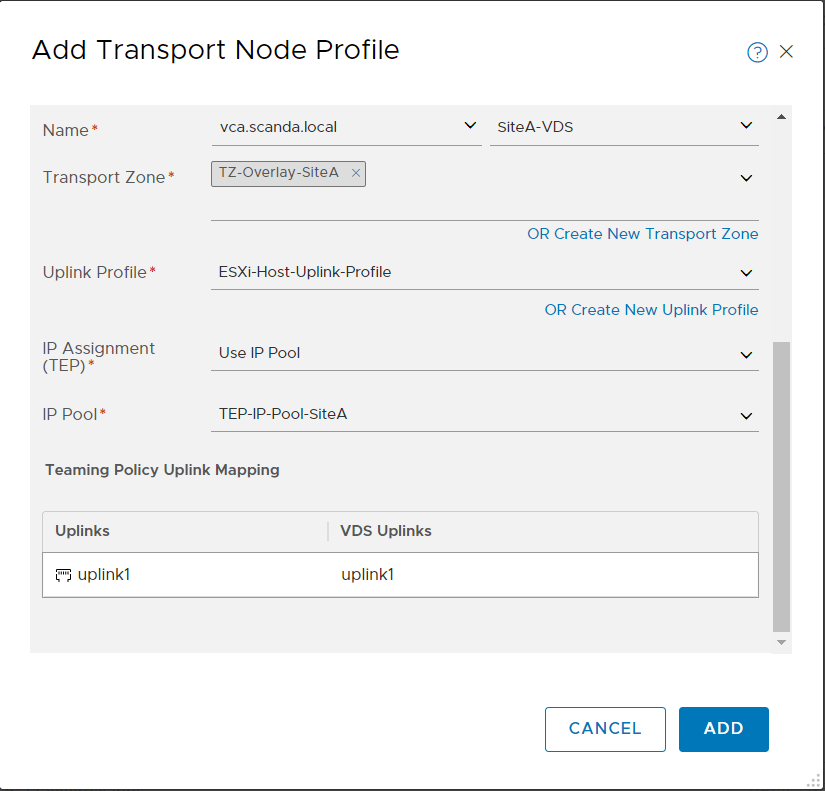
Complete the profile by selecting the previously created uplink profile, the TEP address assignment methodology, and map the profile’s uplink to that of the Distribute switch.
Create the profile with the ADD button.
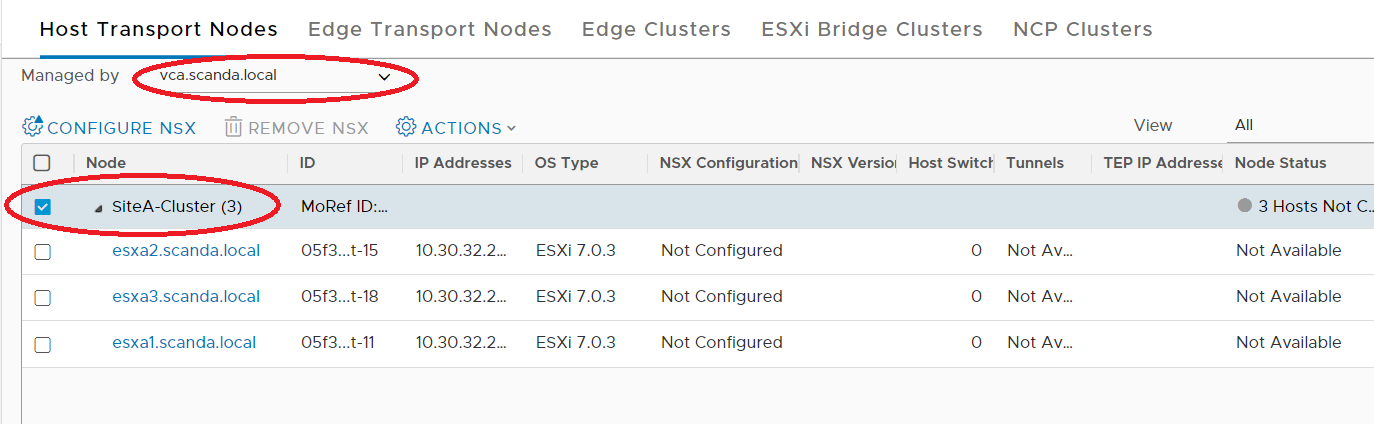
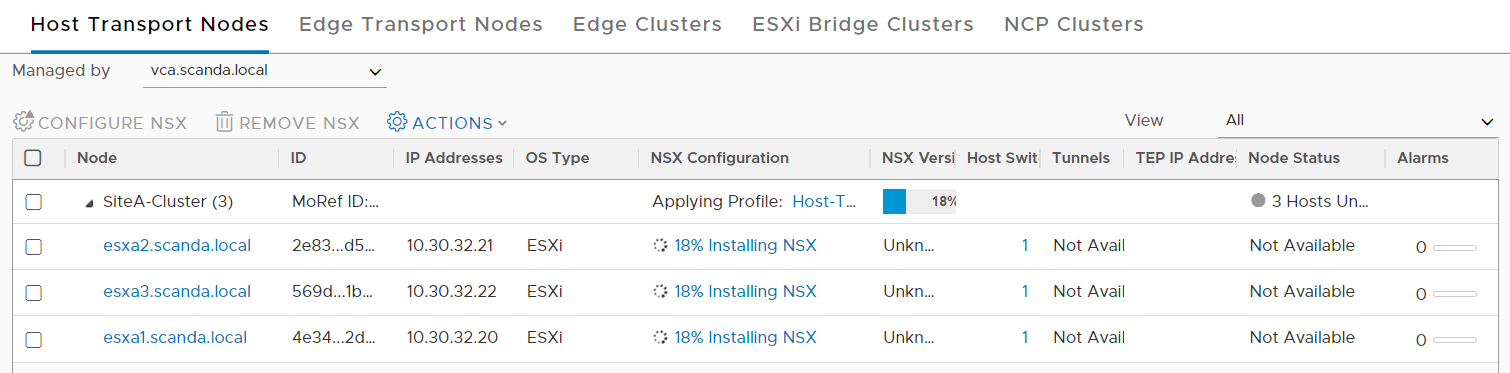
Move to System -> Fabric -> Host Transport Nodes.
Under Managed By select the Compute Manager with the vSphere cluster to be prepared.
Select the cluster and CONFIGURE NSX.
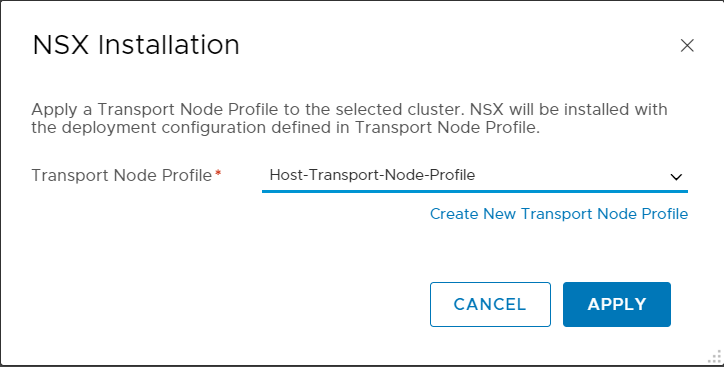
Select the Transport Node profile you have just created and give APPLY.
Start the installation and preparation of the cluster nodes.
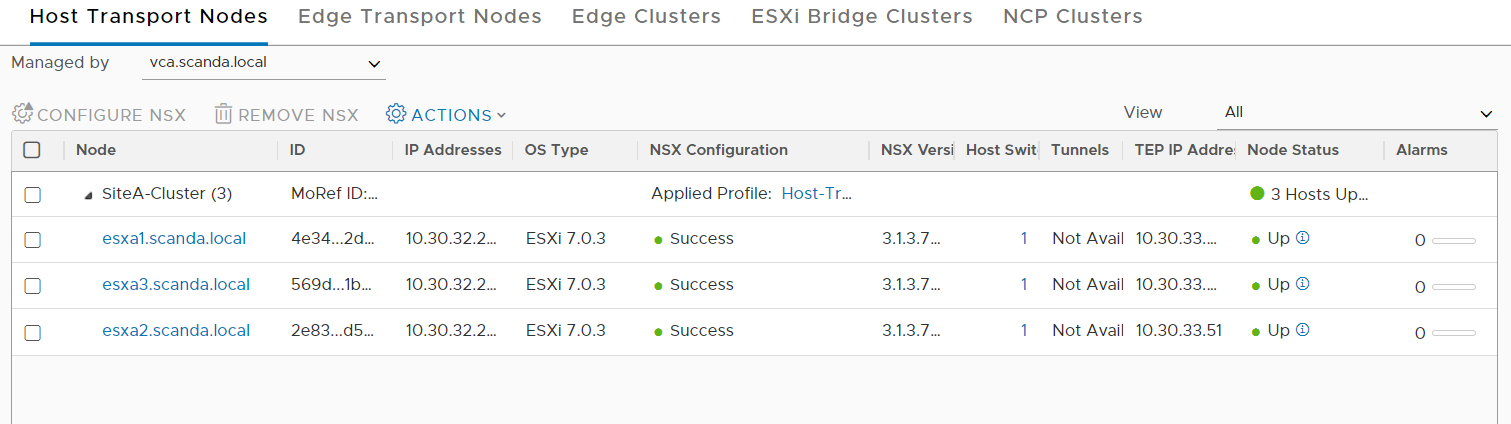
Wait for the configuration process to finish successfully and for the nodes to be in the UP state.
Our basic installation of NSX-T can finally be considered completed 🙂
From here we can start configuring the VM segments and the dynamic routing part with the outside world as well as all the other security aspects!


